100 Stories
Cycling Challenge: Shimanami Kaido Cycling Course

044 / 100

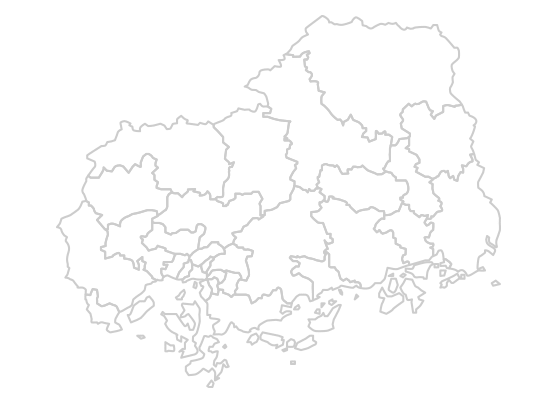
The Course: World-famous Shimanami Kaido Cycling Course, 70-80 kilometers long in total depending on route taken, and ranked by CNN as one of the seven best cycling roads in the world. The full course spans six smaller islands on the way to its destination, using six bridges. The bridges total 9.15km, or nearly 15% of the route.
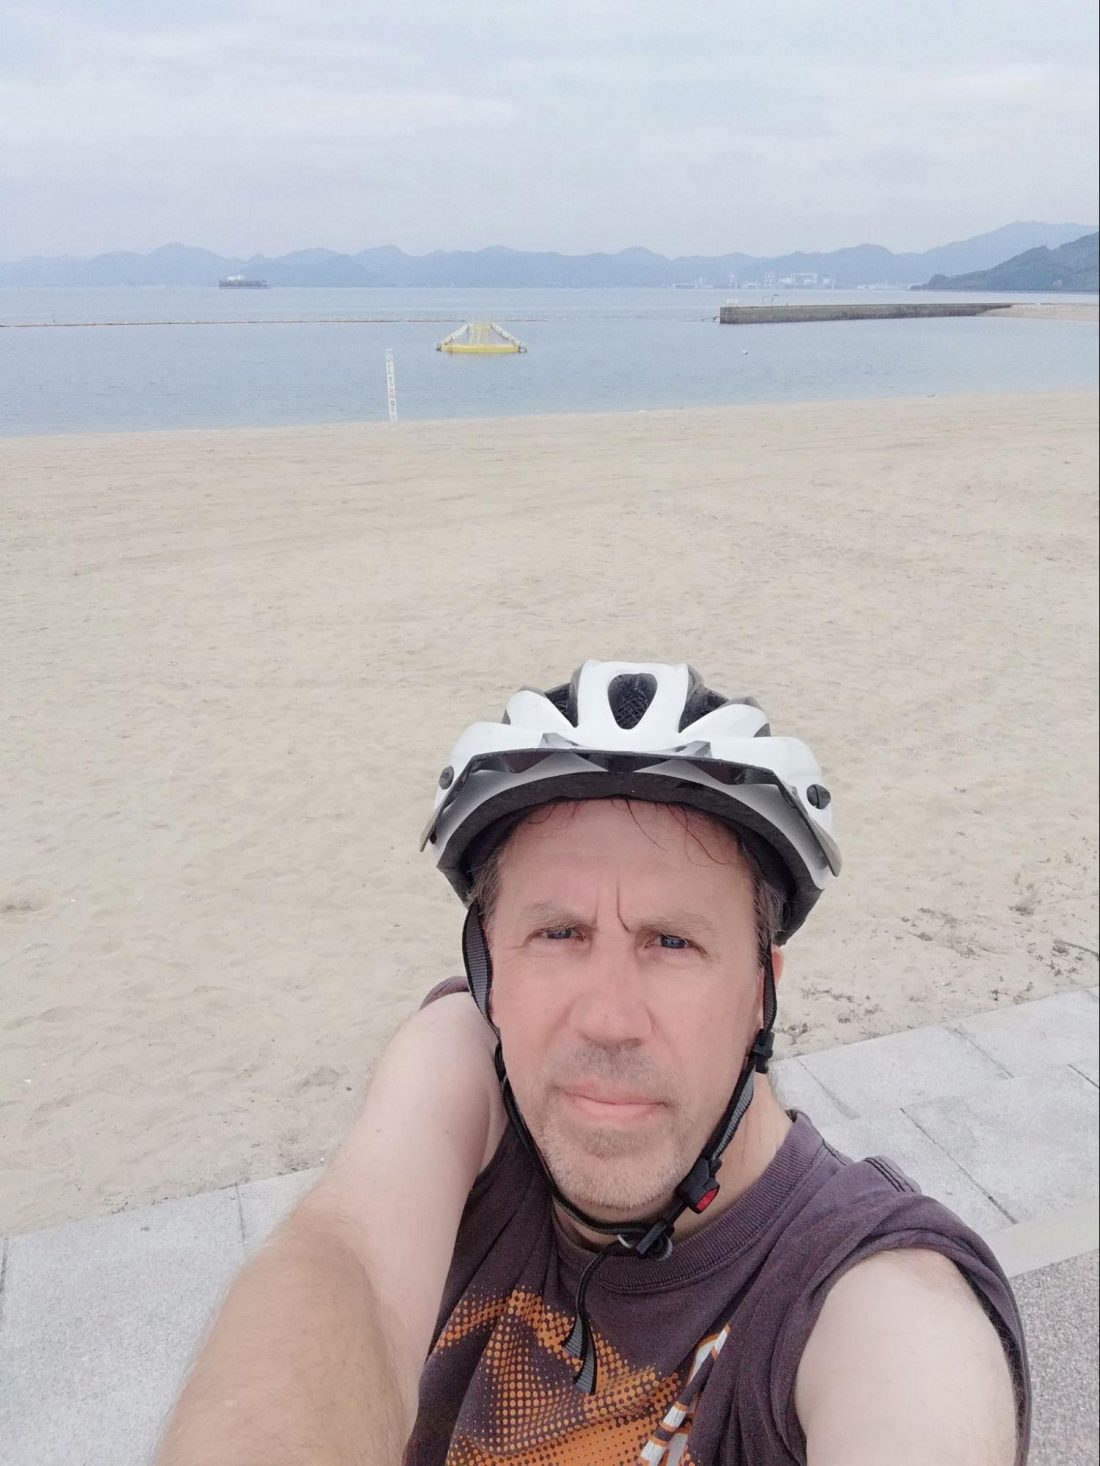
The Challenger: Fifty-one-year-old exercise-phobe, who however does commute by bicycle, logging 3½ hours of saddle time a week, and who is still proud that he regularly rides faster than most of the high-school-aged students he sees on the road daily.
The Challenge: Tackle the “intermediate” level recommended course for day-trippers (in my case half-a-day), an estimated 30-35 kilometers, and still make it back to the city and not be late for work.
Challenge accepted.

Impressions
I was going to start this story with the beginning of my day, 5:30 a.m. in Hiroshima, and take you with me step-by-step (pedal-by-pedal?), but let’s face it: if you are reading this story, it’s because you want to know if the experience lives up to the hype and whether you should consider it for yourself. Yes, and YES!!
I should say, what you really want to do is challenge the entire course and experience that final four-kilometer-long bridge. I’ve added that to my bucket list now that I’ve gotten a taste of the experience. I would also recommend you really look into any of the many hostels, hotels, guest houses, etc., along the route, and make it a two-day excursion with lots of side jaunts, rather than the straight-through blast, but you can’t go wrong, really. I loved my experience over the half-distance, and I am assured by a friend that the straight-through route is highly rewarding and very easily doable in a day, so all options are well worth it.
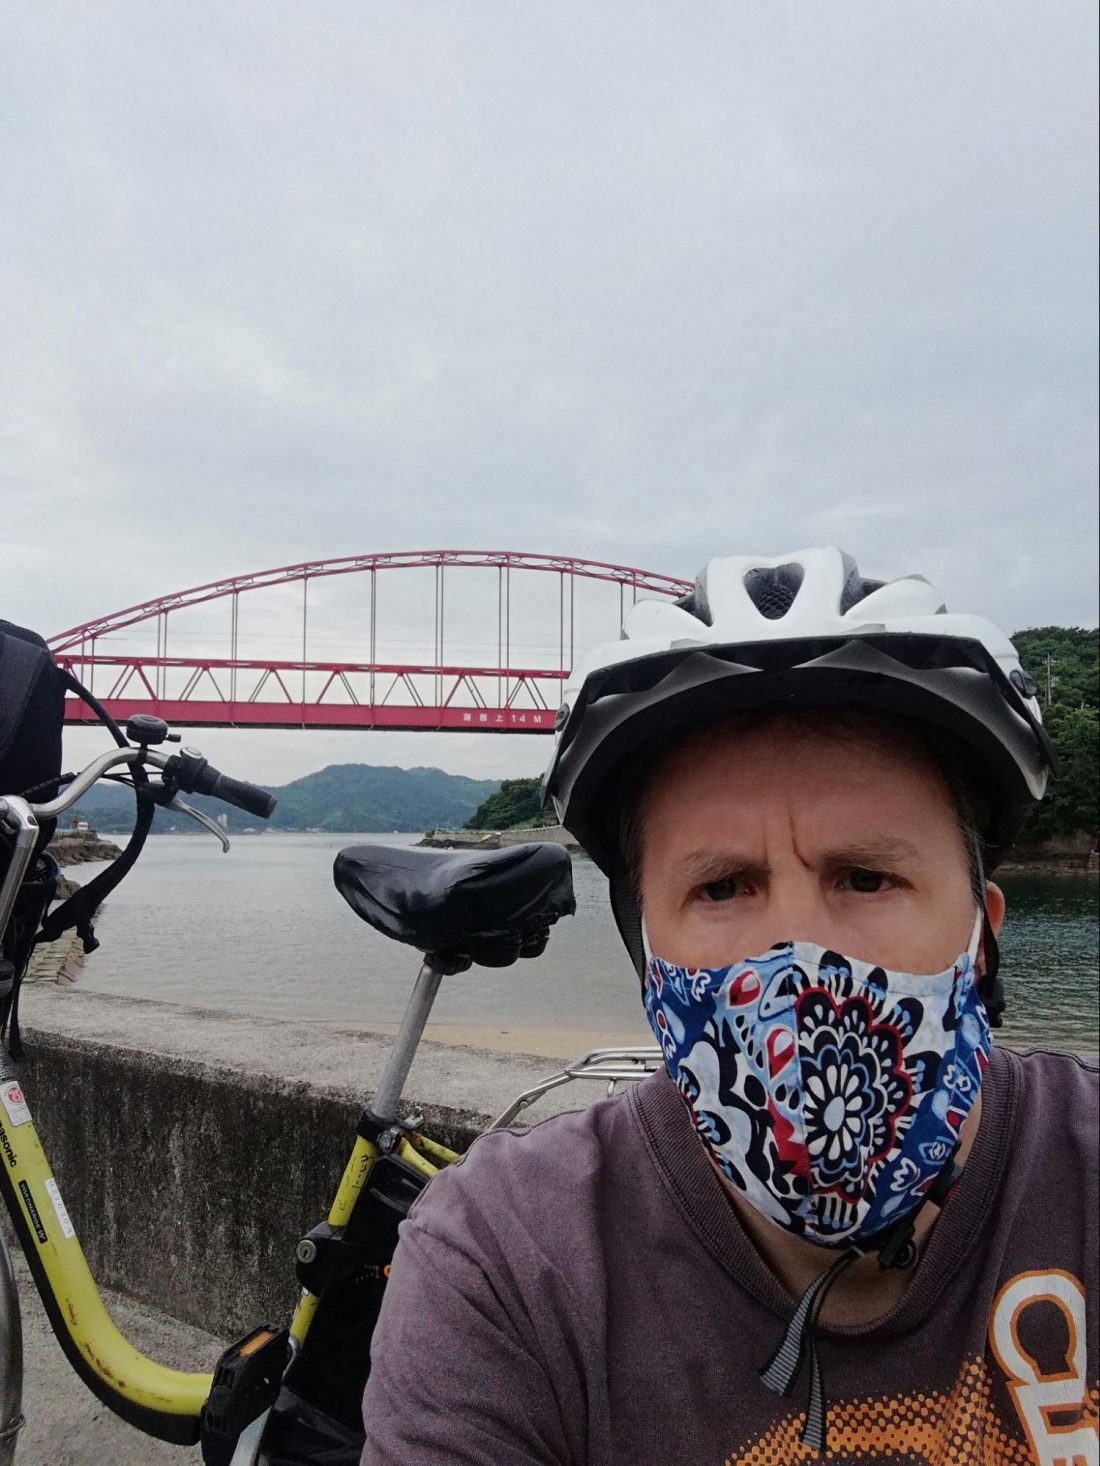
First of all, the bridge rides are stunning. I only got to cross two, but when I realized I was just five-kilometers from the third, the temptation to gamble on missing work was very, very strong. It would have been barely doable, so I couldn’t be sure and resisted, but the other two bridges are a memory I’ll keep for a long time already.
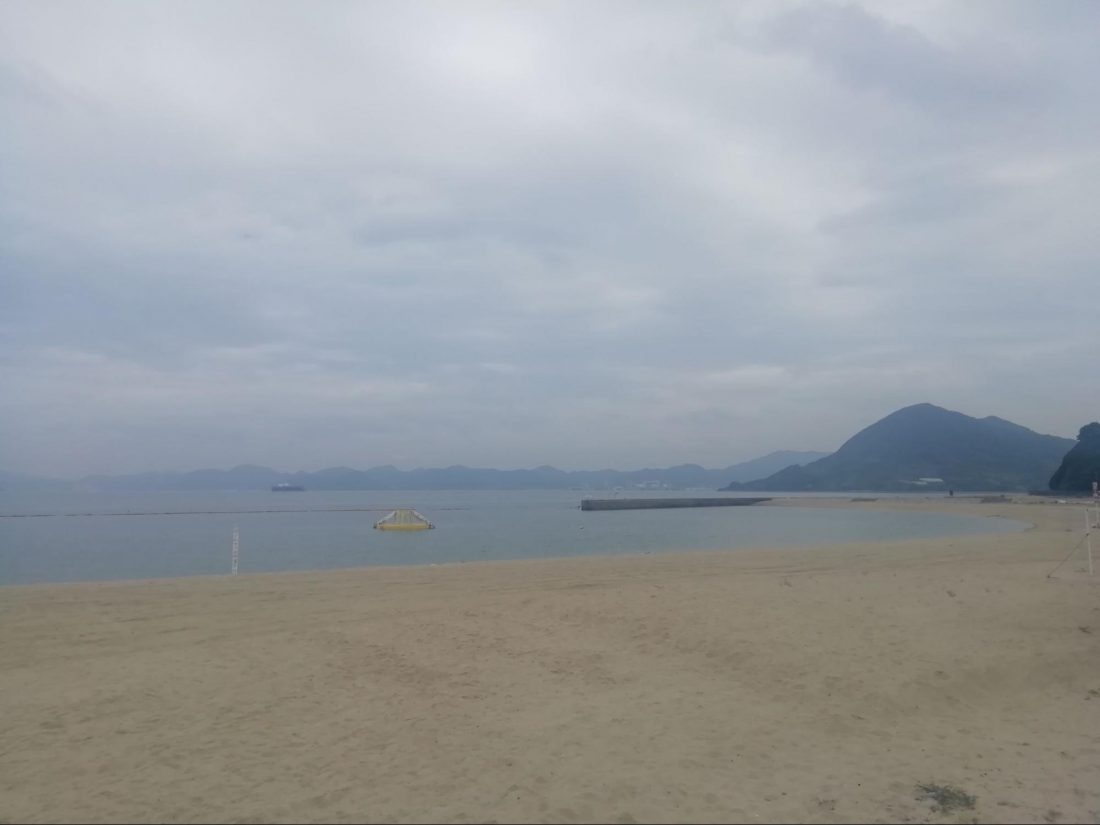
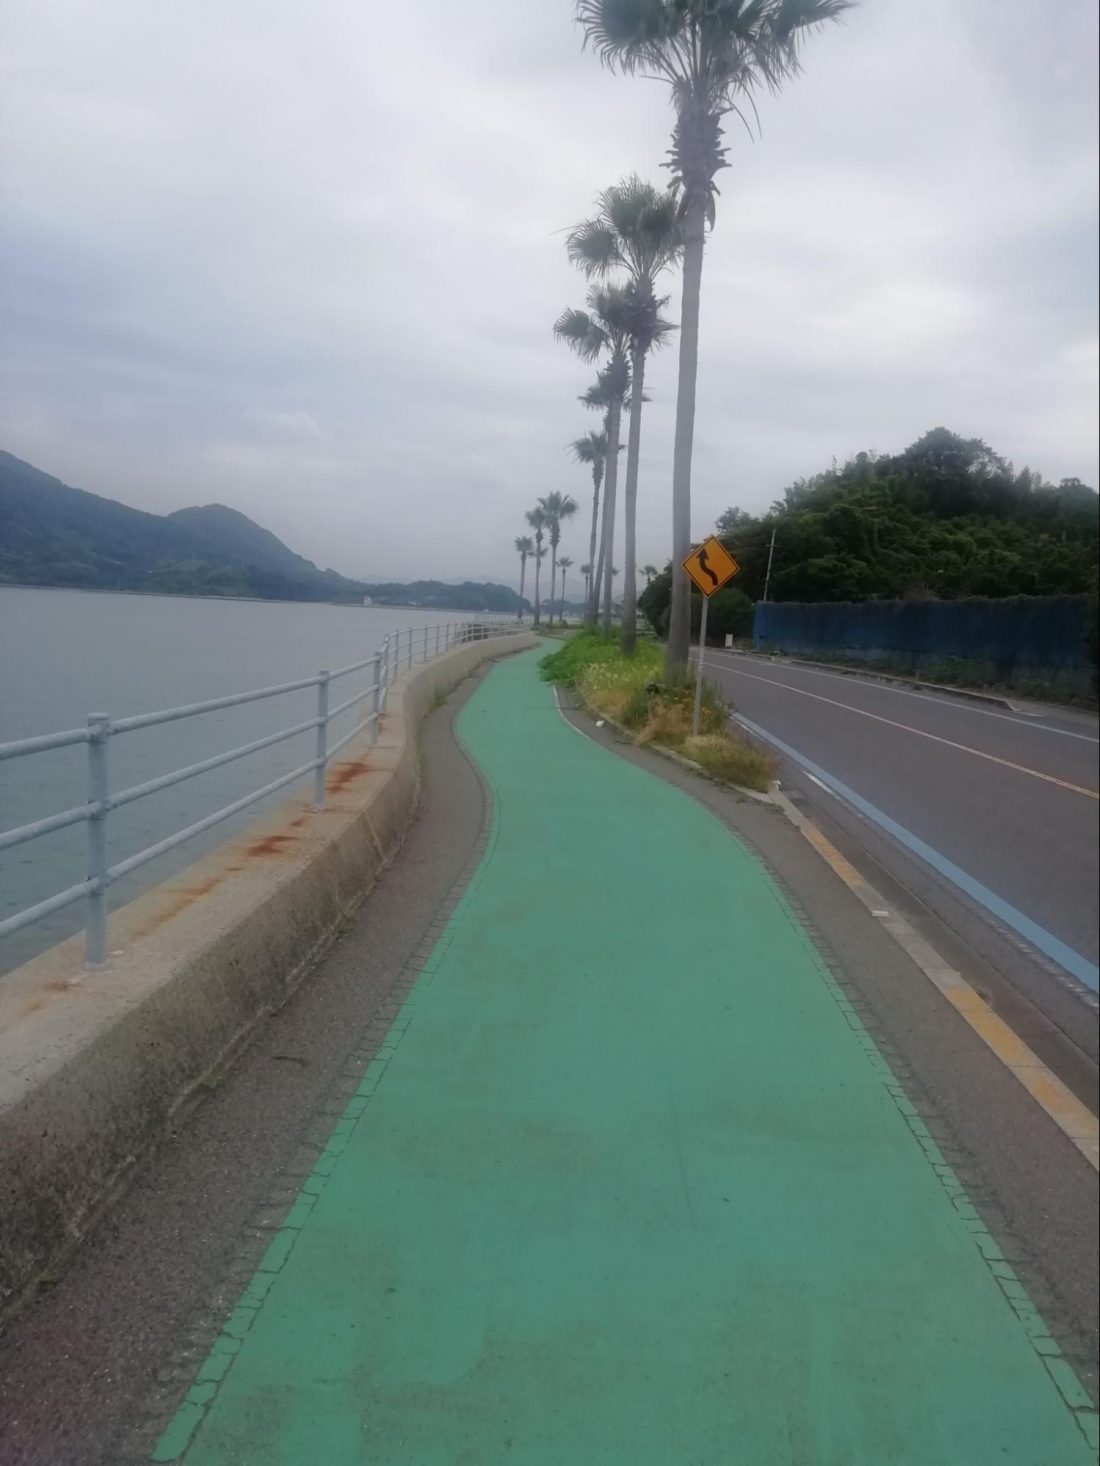
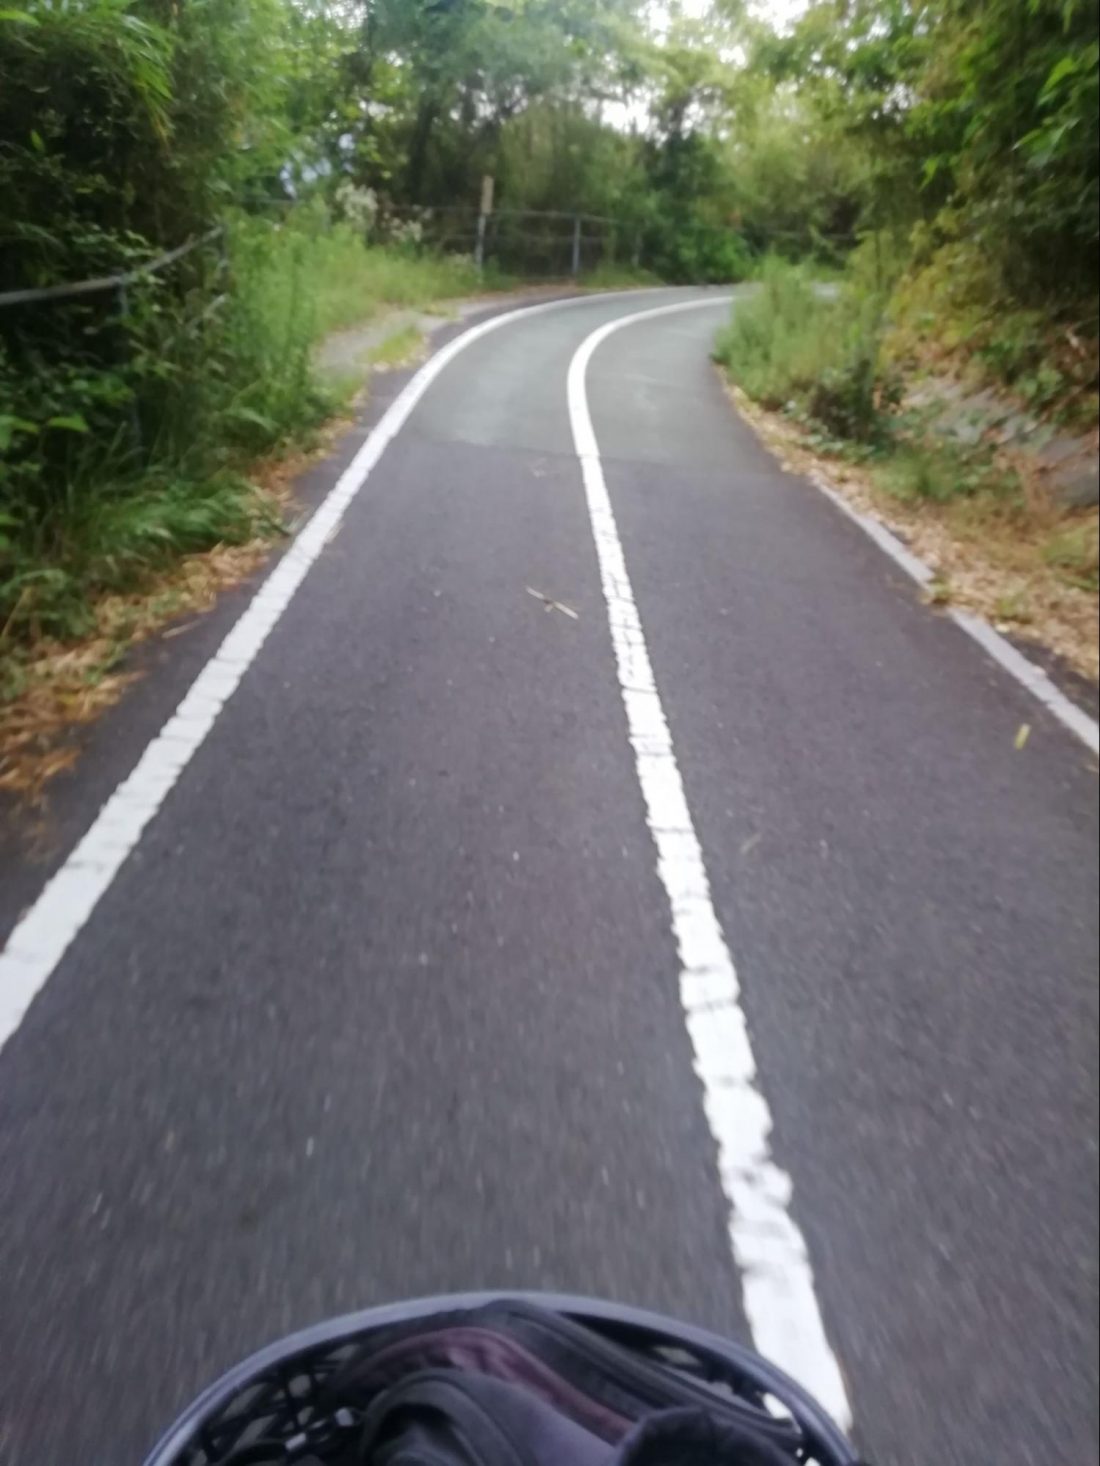
Secondly, the coastal rides are also stunning. It was very hard not to continually stop to take photographs. The only thing that did stop me was realizing that, in the end, they’d mostly look the same. But while riding it’s nearly impossible to feel fatigue because the view is just too amazing.
Finally, the possibility of side adventures is amazing. I managed to throw in two sightseeing adventures, one which required a short detour, and it was well worth it. I’ll explain further below, but the maps of the area are filled with tidbits about potential sightseeing spots, and most were well-marked along the way. If you have the time, this ride can truly be an adventure.
Okay. Now to the details.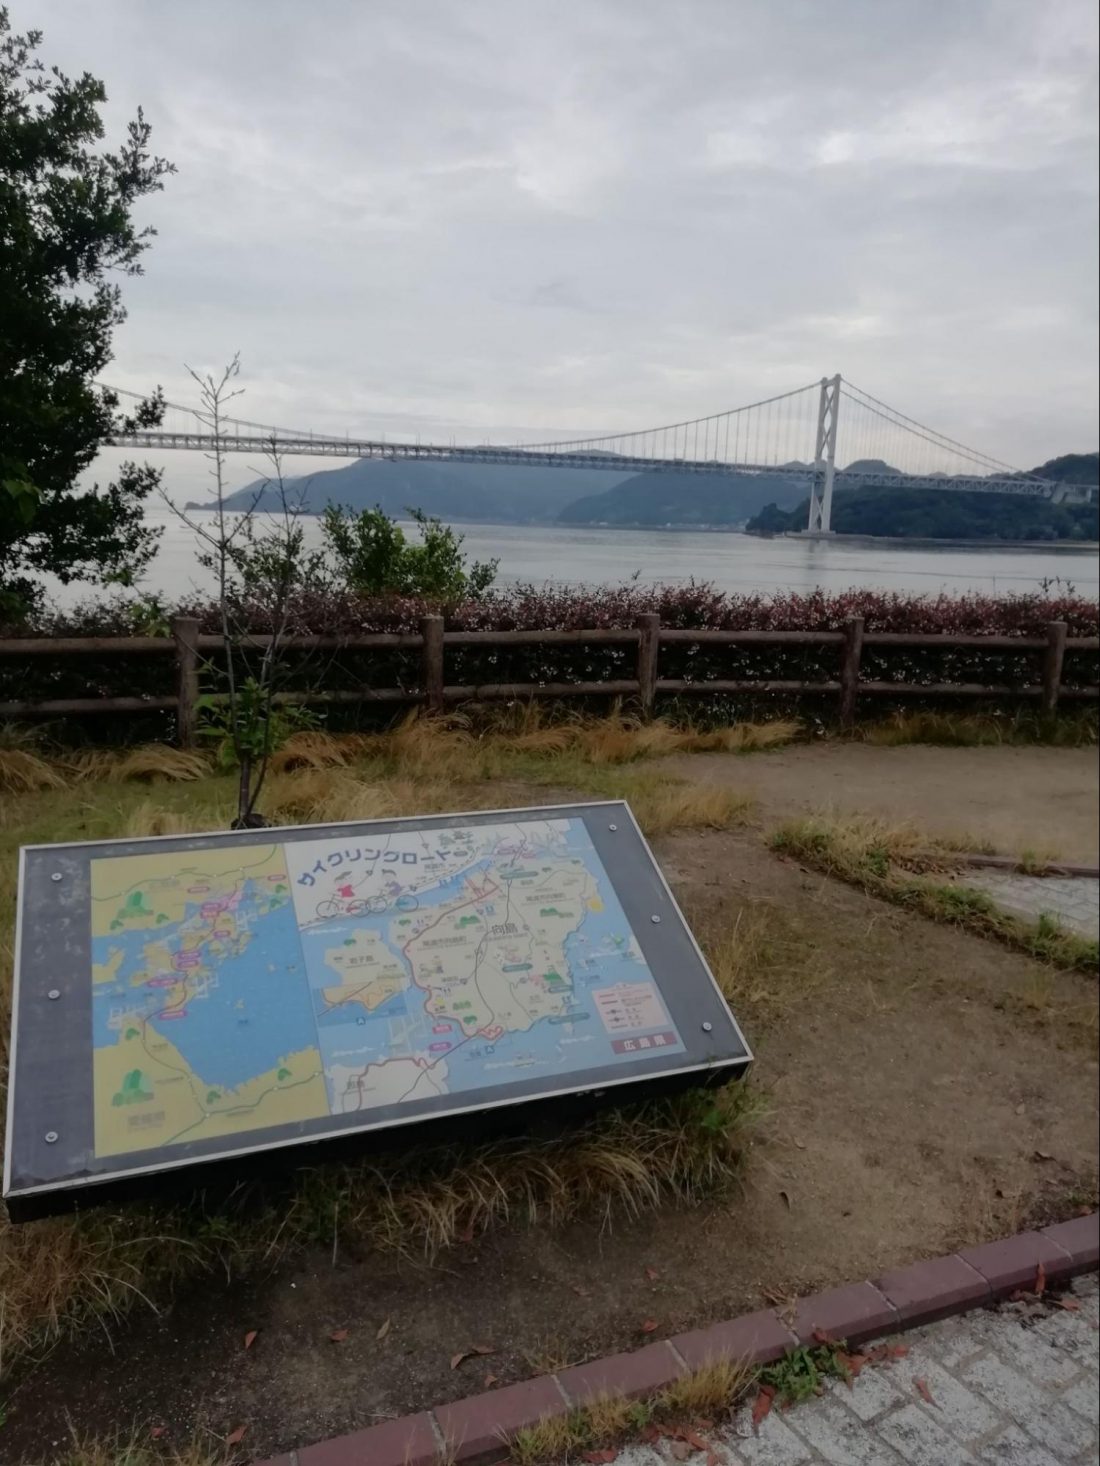
Getting There and Getting Started
If you are coming from Hiroshima City, as I was, your starting point will be the town of Onomichi, which is a charming destination in its own right. You have several options for getting there based on your status. If you are a tourist with a rail pass, I highly recommend you take a local Kodama Shinkansen to Mihara, and then it’s just two stops by local train; or take an express Shinkansen that stops at Fukuyama, and then it’s a four-station back track, or just 15 minutes. If you are not eligible for a rail pass, like me, you can pay the Shinkansen fare or just take the local train all the way. It’s a little over 90 minutes with one train change, and costs ¥1,500. I should note that there is only one train an hour that will get you all the way there without a long wait at some station along the way, so check the schedule carefully. I wanted as early a start as possible, so I took the 5:50 a.m. train. Super early, I know, but worth it once you start cycling. There also seems to be a highway bus of comparable time and cost, but the cycling road begins literally across the street from the station, so I’d stick with rail unless you really love buses.
Next step is renting a bicycle. While there are independent rental shops sprinkled here and there, it’s far easier to stick with the “official” and aptly named Rent-A-Cycle, as the Onomichi location is literally next to the start, and they have 13 official terminals along the route, all locations where you could drop off your bicycle if you’ve finished your ride. Most people choose a finishing spot and then ferry/bus/train back to Hiroshima so as to not have to double back or deal with their bicycle on the return. A caveat – plan your return carefully. The brochures and websites strangely give very little advice on how to get home after completing your ride.
For now, choose your bicycle. They offer several options.
General Use/City Bikes – Don’t do it!! I usually call them “Dorothy” bikes to give the proper image. While most of the ride is fairly easy, in order to cross the bridges there are a few fairly steep climbs. You’re not likely to get far along the course on one of these bikes.
Mountain Bikes and Cross Bikes – Get this! I couldn’t tell the difference at first, but it was pointed out that the mountain bikes have thicker tires. Either one of these is the choice you want. If you are going mostly straight through, the cross bike is probably better. If you are interested in doing some of the side excursions, the mountain bike might be a little better as several (most?) of the sights are in the more mountainous parts of the islands.
Electric Assist Bikes – Good short trip option. Point of honesty, in order to write this article I chose one of these. Having never been on one I had no way of describing whether it was worth the extra 500 yen in cost. So I valiantly went for it just to pass along my wisdom. Attached to one of the “Dorothy” bikes I mentioned above, at first I greatly regretted my choice, especially because they don’t have straight handle bars, but the kind that curve in so your elbows are at your hips. I find that over a long ride that position makes my arms more tired. That said, the assist it gives is great!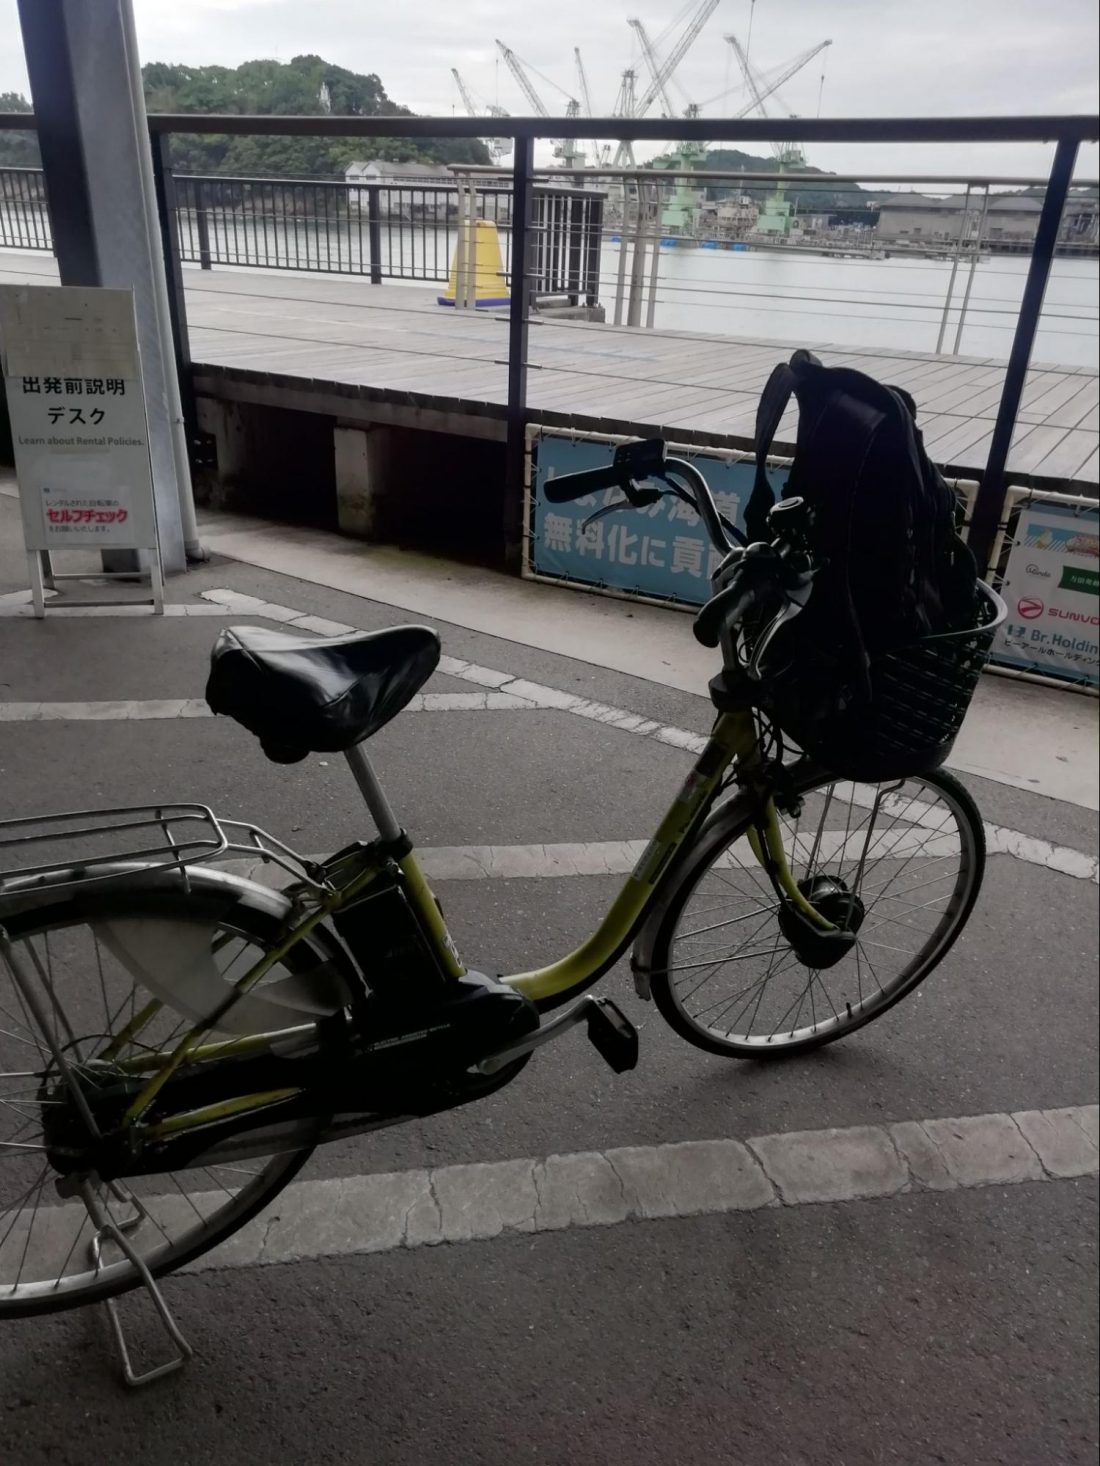
Setting Off and Mini Moment of Joy
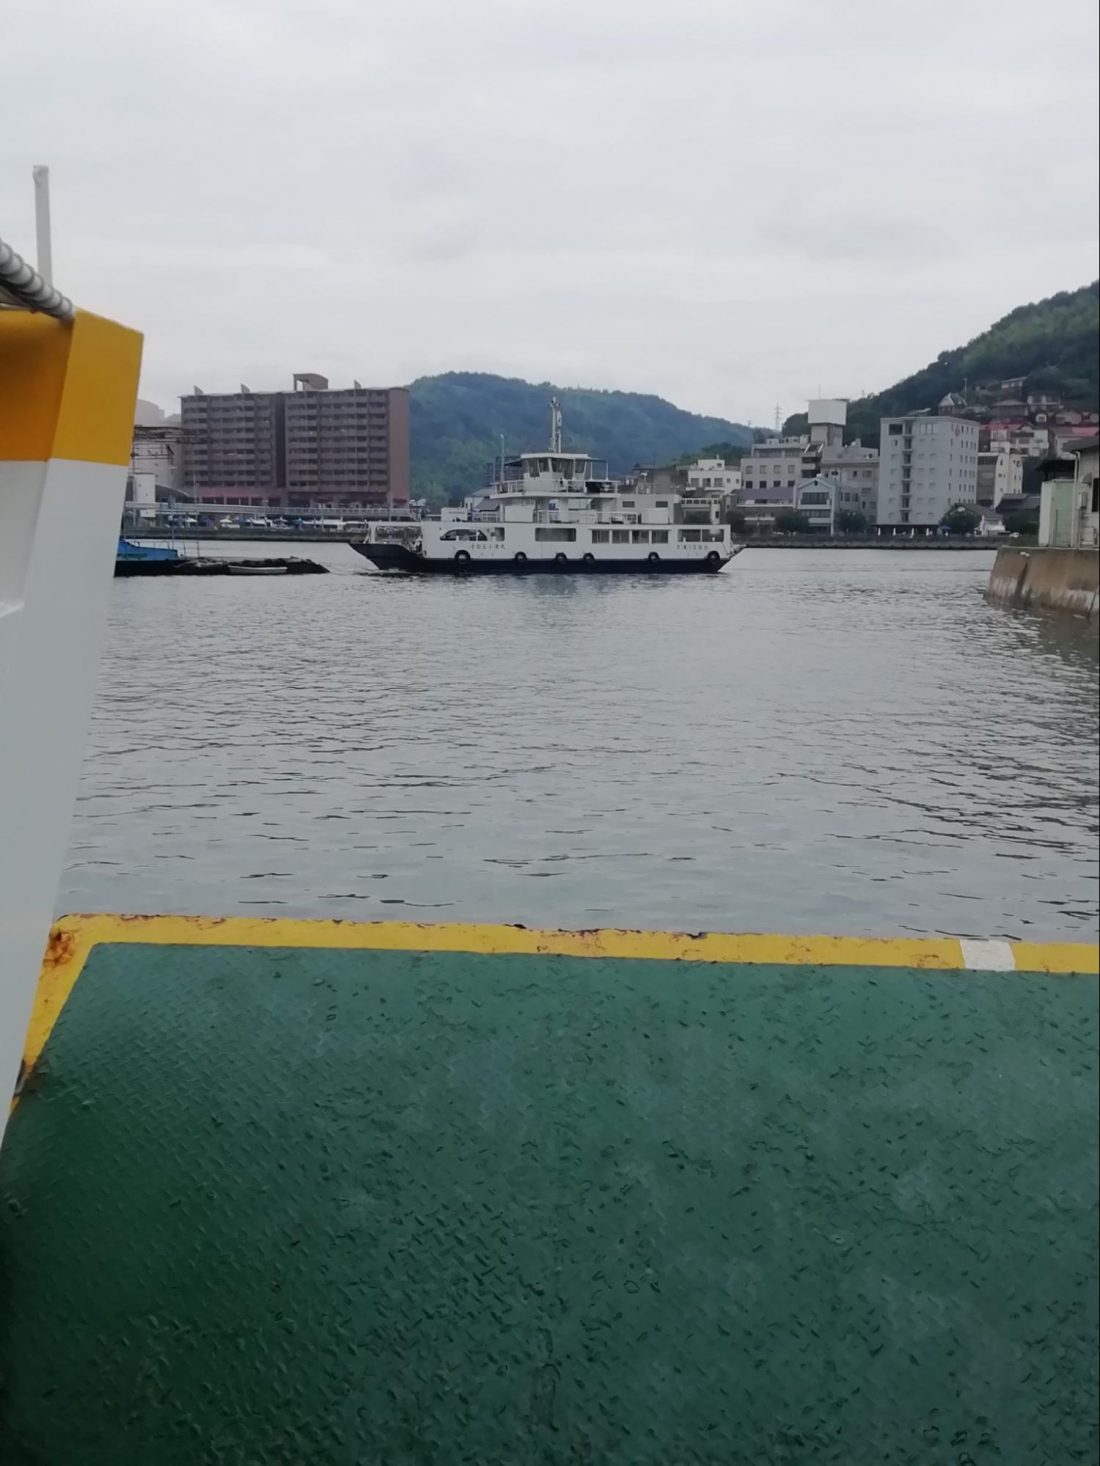
The route starts with a short ferry ride that costs ¥110. This is barely mentioned in the brochure or the website, so I was a little annoyed at first, but the ferry port is next to the rental shop, it’s less than a five-minute ride, and ¥110 is less than the cost of a soda from a vending machine. Plus, the bridge is five minutes away and heavily trafficked. Take the ferry. For what it’s worth, the brochure map I received states “it is said to be the shortest ferry ride in the world,” so that’s something to brag about.
I rode with a packed ship of high school kids at that time, 8:00 a.m. Just an interesting side note because I imagine islanders ferrying to the mainland for school, not the opposite. Getting off the ferry, I was surprised by one thing. The ferry port at that spot is about the least well-marked location on the whole route. I was a little confused over where to go, but there’s only one main road at first, so I just set off, and I decided to turn on the electrical “assist” on my bike from the start.
Not sure what an “assist” bike really was, it turns out that rather than moving the bicycle for you as a motor attached to the tires, it’s a motor attached to the pedals that only kicks in when you actually pedal. If you coast, you’ll glide to a stop as always. But when you pedal, it’ll “assist” you with a boost so that you hardly feel like you’re pedaling.
Not knowing this beforehand, I turned it on, stepped on the pedal, heard a whir, and then… Well, the instant image that came to mind was Batman and Robin in the Batmobile when they hit the “turbo” button. This was my mini moment of joy. Okay, it didn’t slam me backward, but it did give a far stronger boost than I expected, and the Batmobile image made me laugh. Also, that assist turned out to be a godsend on hills. More on that in a bit.
Mukaishima and Innoshima Bridge
I was honestly a little disappointed at the start. The website promises images of coastal rides and bicycle-only lanes, and those bridges, of course. However, at the start you are passing through a normal little town, and riding on the edge of the road with cars passing close, which reminds me to pass along this earned advice. The maps color code the various routes, including for Beginner, Intermediate and Experienced. However, the routes themselves never once make note of those designations. There is merely a thin blue line painted on the road that indicates the cycling course. That line is occasionally in need of paint touch-ups, and places where the routes split and the line goes two different ways are mildly confusing. But overall, the combination of that line and your map will get you pretty easily all along the course.
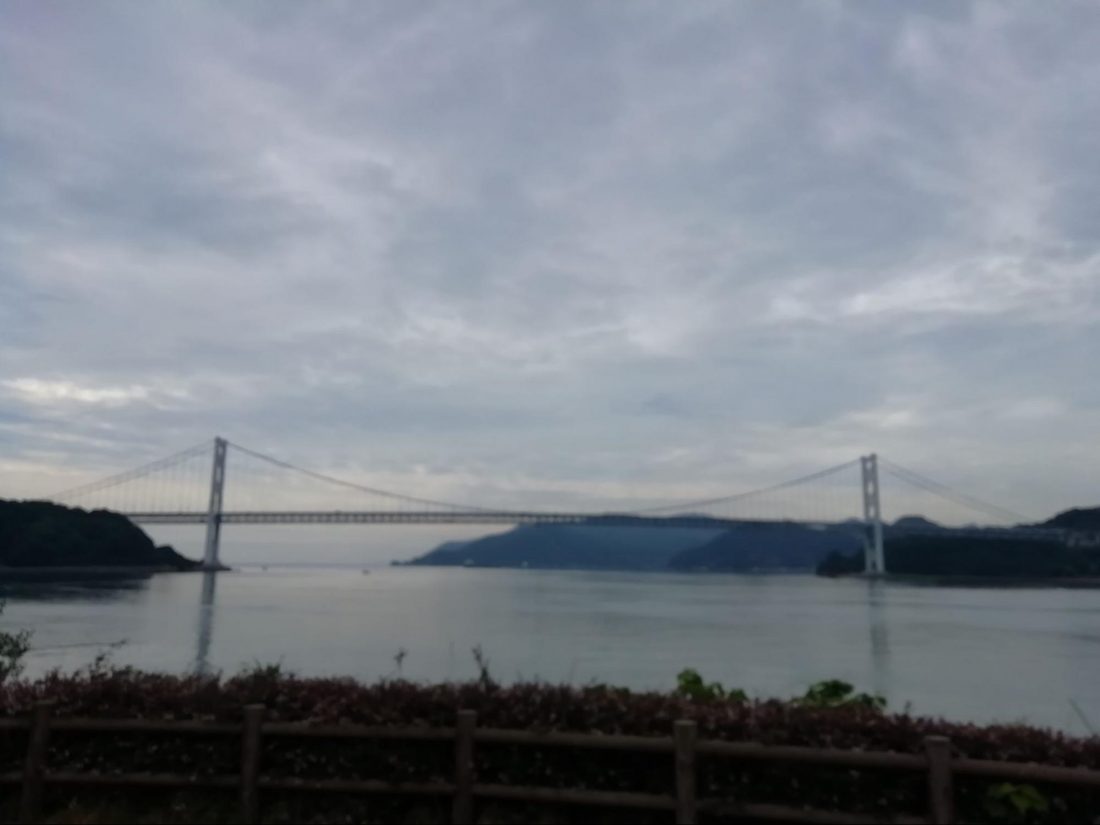
In any case, passing supermarkets and such while riding next to cars is exactly what my daily commute is like, but before long you’ll get a glimpse of the coast again, and then the road will finally become the coastal road you are imagining. Soon after that, you’ll see your first bridge and start getting excited. Nearly 1.3 kilometers long, you start thinking, “I’m going to be crossing that!” and your pace will increase. Then you find out the access point is waaayyy up high and start your first real challenge of the ride. That said, there is a bicycle-only access road (beware the occasional 50cc scooter that can also use it) that follows a slow meandering twisting ride up to the bridge. It’s not a straight climb and rarely that steep, but that means it takes a long time to get up there.
Welcome to the bridge. This first bridge has a bicycle only road UNDER the actual road, not alongside it. As such, it’s a bit too caged in to match the image in your head of biking over the water, but it was still very cool, and the view amazing, and I predict halfway through, like me, you’ll realize 1.3 kilometers means you’re on that bridge for a really long time, which is pretty cool.
(insert video 1 here)
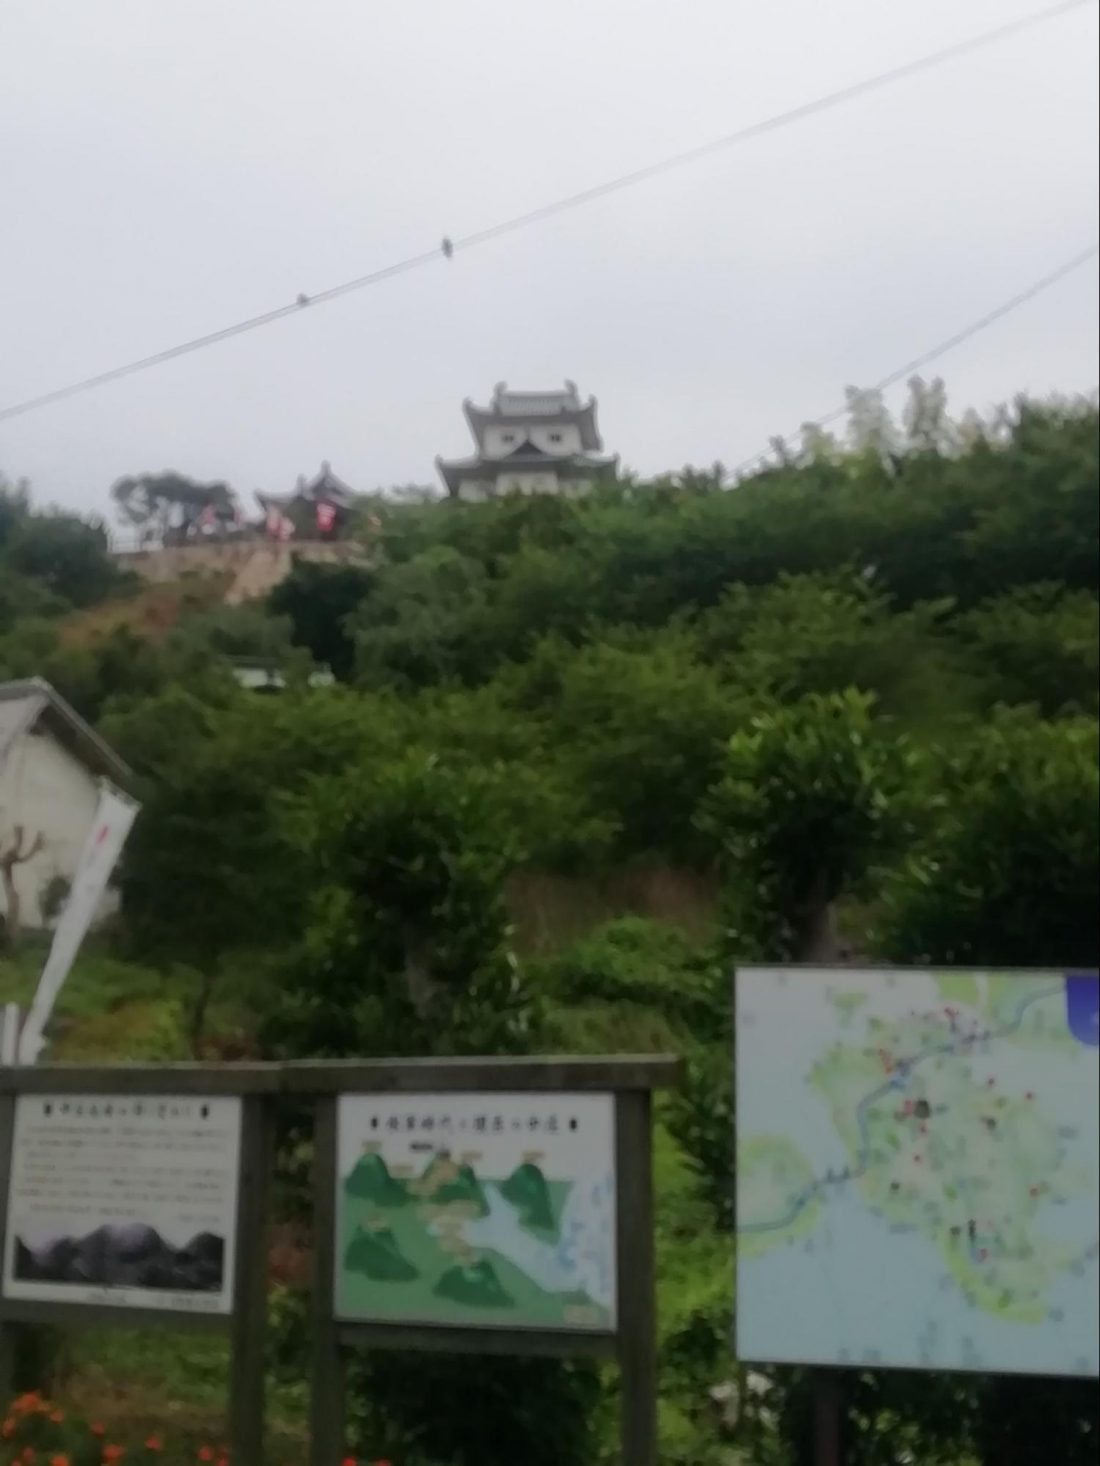
Innoshima Island and First Detour
Here is where parts of the course got confusing for me. A route split I didn’t quite understand took me on a 2.9-kilometer steep hill road rather than a two-kilometer coastal spur. I then saw signs for Suigun Castle and was intrigued, but the road sign toward it pointed me away from the cycling road. Still, the signpost said it was less than three kilometers away, so I decided to detour. I realized later the castle is on a bike route, but only if I had turned the opposite way off the bridge initially. Being a small island, eventually all roads merge anyway.
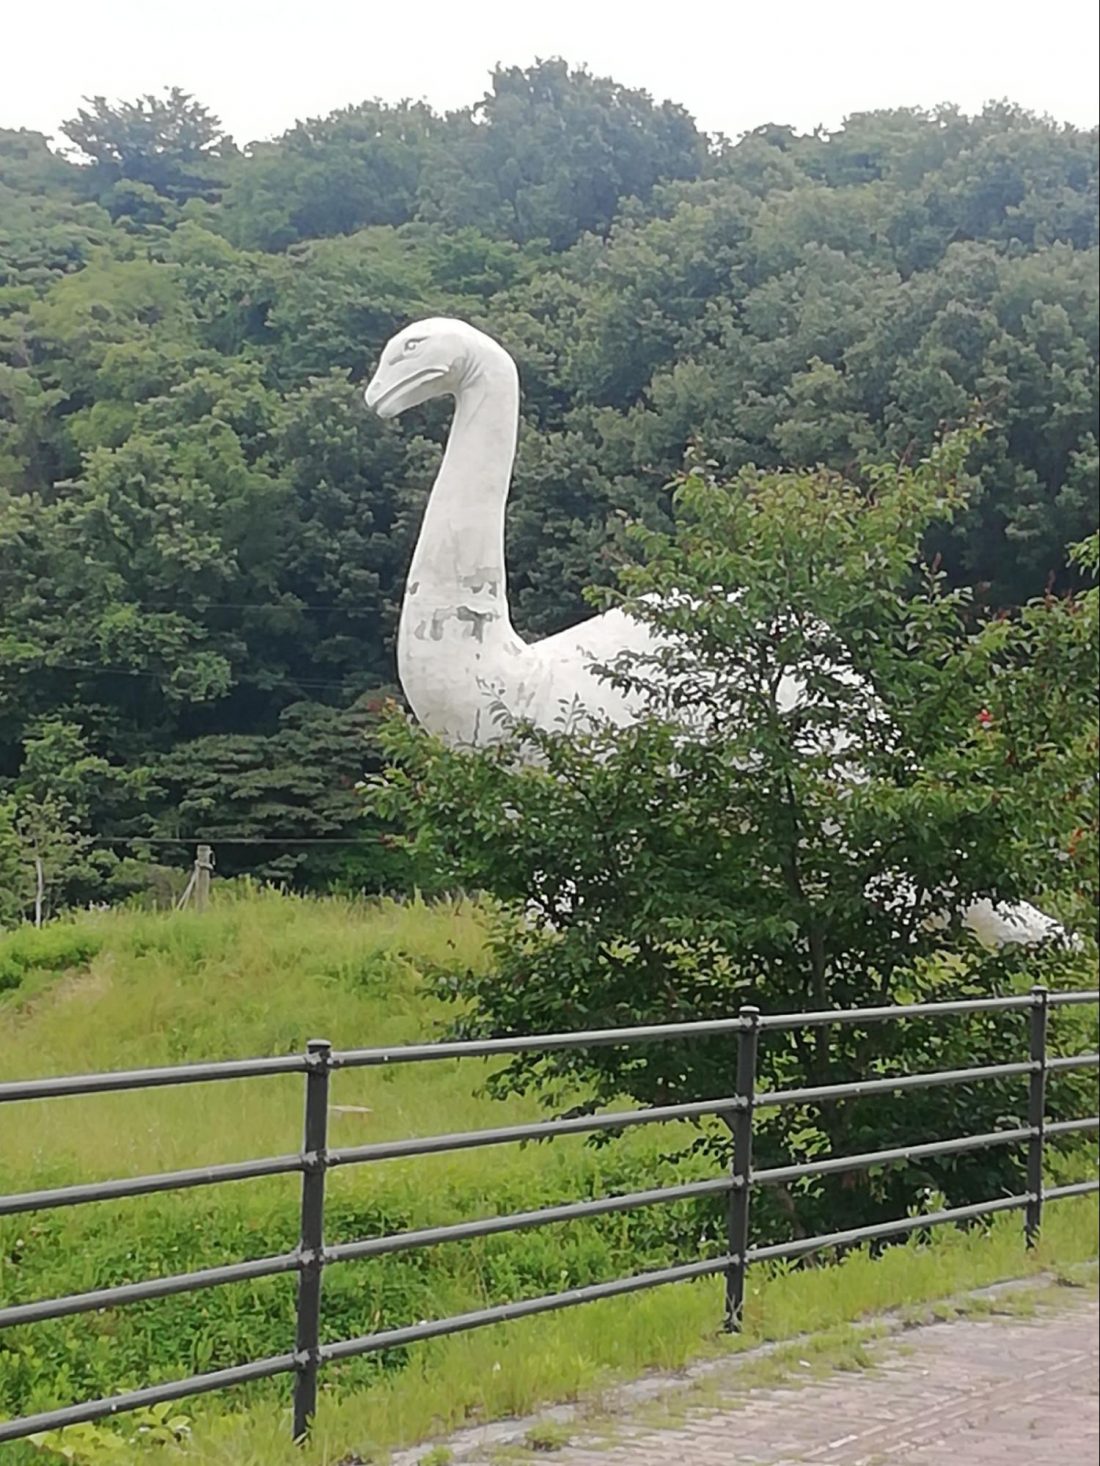
It took a small bit of effort, but in the end, I saw a truly charming small castle high up a hill. The brochure seems to indicate the castle is 500 or so years old and assures me there are weapons and armor and a great view if I had walked up, but I still had a lot of riding ahead, so I made myself be satisfied with a photo. This is why I say if you have two days, ride AND explore. There are some gems to be found. Even when not detouring there are still also various cool and odd things that will suddenly appear along the way — like a dinosaur for no discernible reason! LOL!
Road signs pointed toward where I needed to be headed, so I quickly was able to reconnect with the cycling road and head to the second bridge. Both Mukaishima and Innoshima have other locations of appeal listed, primarily two “observation decks” which I expect to be great, elevated views of the sea, but I was mostly about moving on, so I got to bridge number two and my true moments of joy.
Moment of Joy: Ikuchi Bridge and the Dash to Sunset Beach
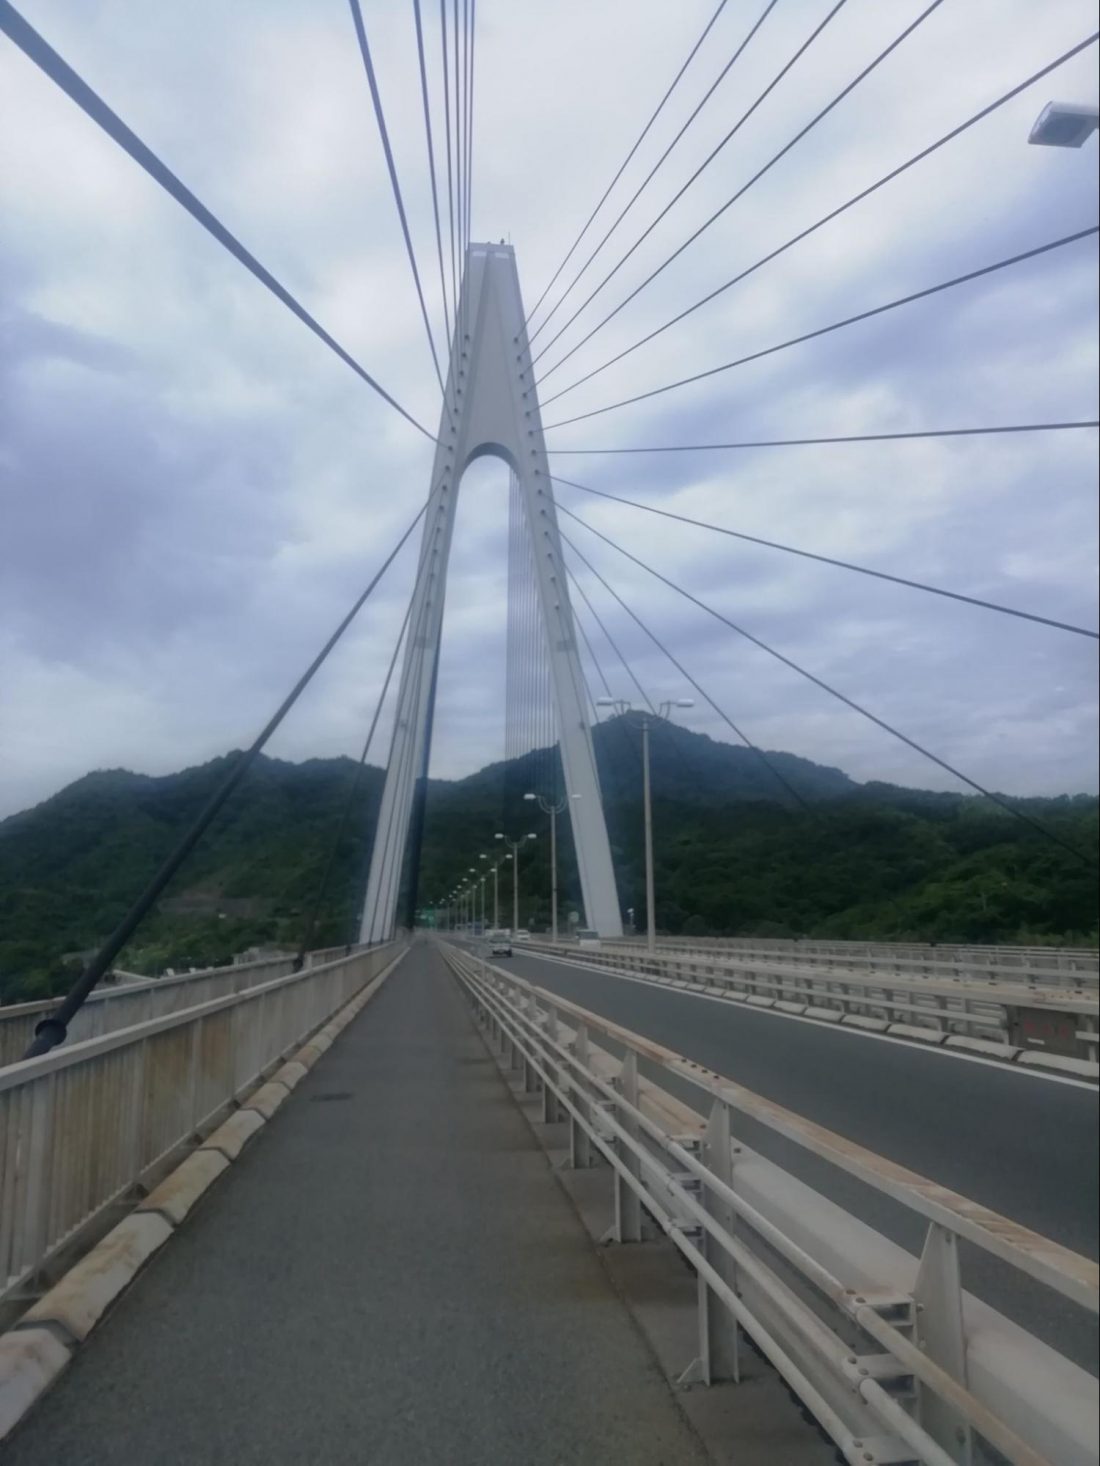
Ikuchi Bridge is “only” 790 meters and the second shortest of the route, but it’s a truly beautiful cable-stayed bridge that finally offered me the open-air, top-of-the-bridge ride over the sea I had been waiting for since deciding to come here. It did not disappoint. If this “short” bridge was that much fun, my mind reels at the joy the final four-kilometer bridge brings, thus explaining why finishing the full run is on my bucket list now.
For this day, after another long, meandering, moderately-steep climb to the bridge I rode out across, I giddily saw a far less-obstructed view than the first bridge provided and was simply grinning from ear-to-ear the entire way across. This Moment of Joy was such that I probably could have U-turned right there and been satisfied. I might even have just done multiple U-turns on the bridge for a while, except those long, meandering roads up are matched by exciting, but twisting and long roads down, so it would have been the most time-consuming and convoluted U-turn in history. So instead, it was on to the beach.
I had mapped out the time I needed to catch the ferry I needed to catch the train I needed to get back to Hiroshima on time. What I didn’t know, however, was how possible this was going to be from the bridge. Ikuchijima promised a long coastal run to the port of Setoda, so I planned on just leisurely enjoying the final part of my journey. But as I was riding and seeing road markers, I started realizing I was ahead of pace, and my ultimate dream of reaching “Sunset Beach” beyond the port was in reach. So I started going faster.
It’s all coastal here for a very long stretch, and I was really enjoying speeding along the road. I saw a mysterious shrine hidden up a forested hill, a truly charming shopping arcade street, and signs for another major temple, but I was going to make it to the beach! And I did! With time to spare! Cue the next Moment of Joy.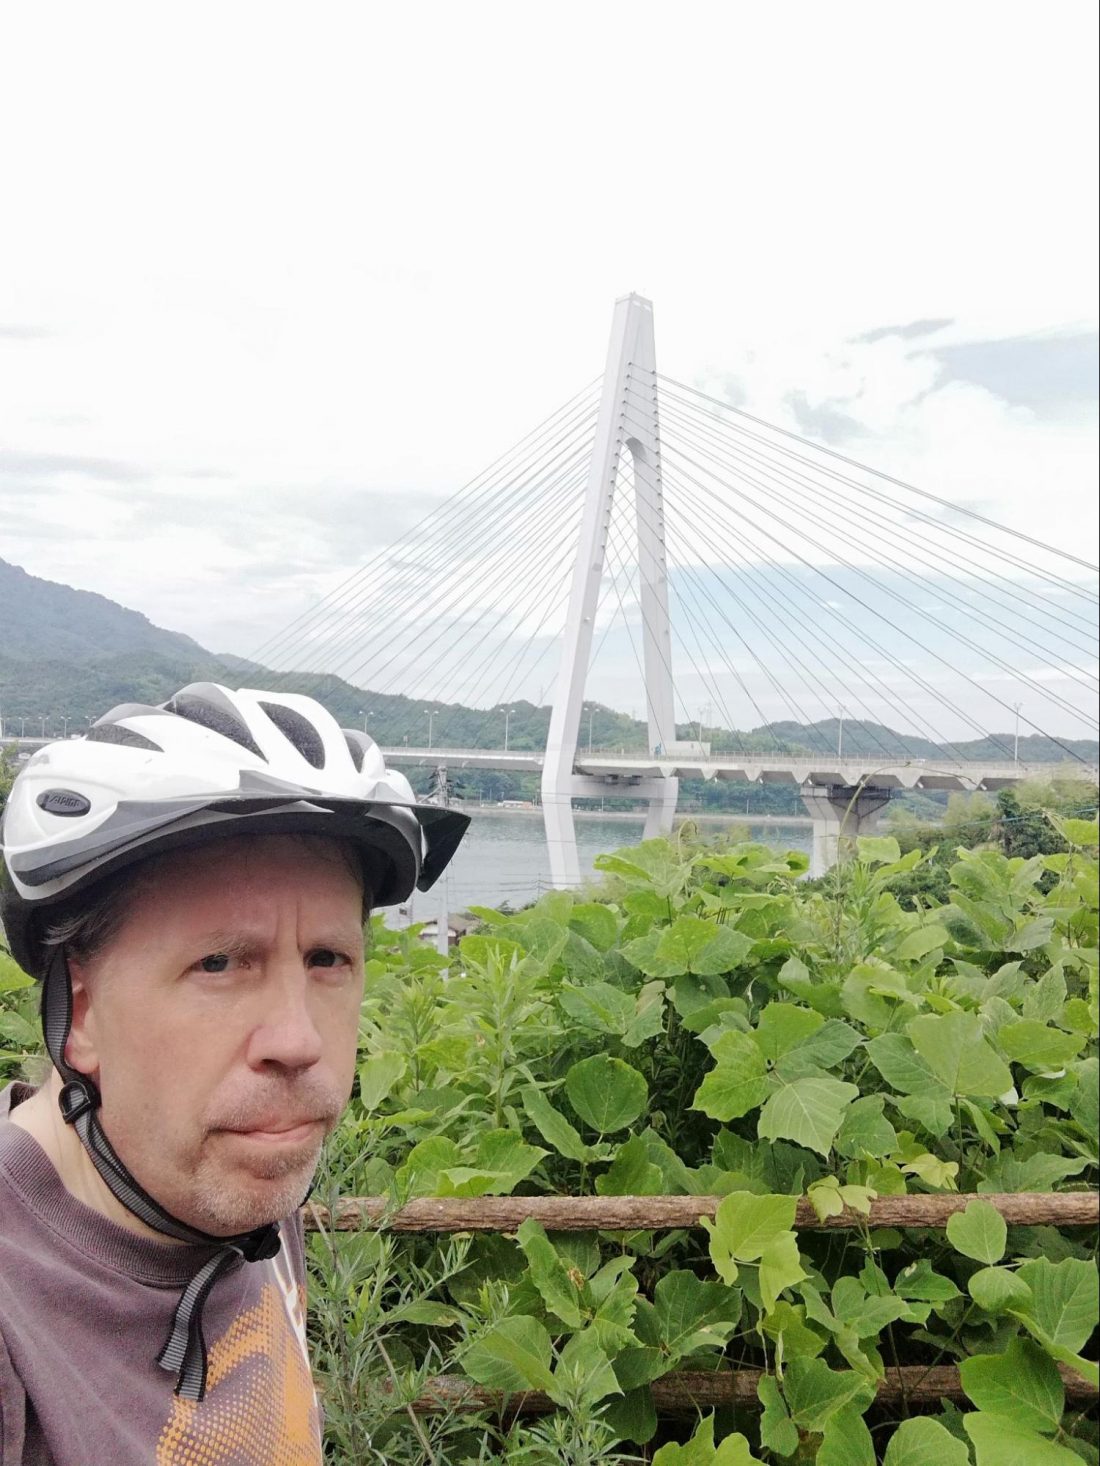
(Insert 2nd Video Here)
End of a Journey
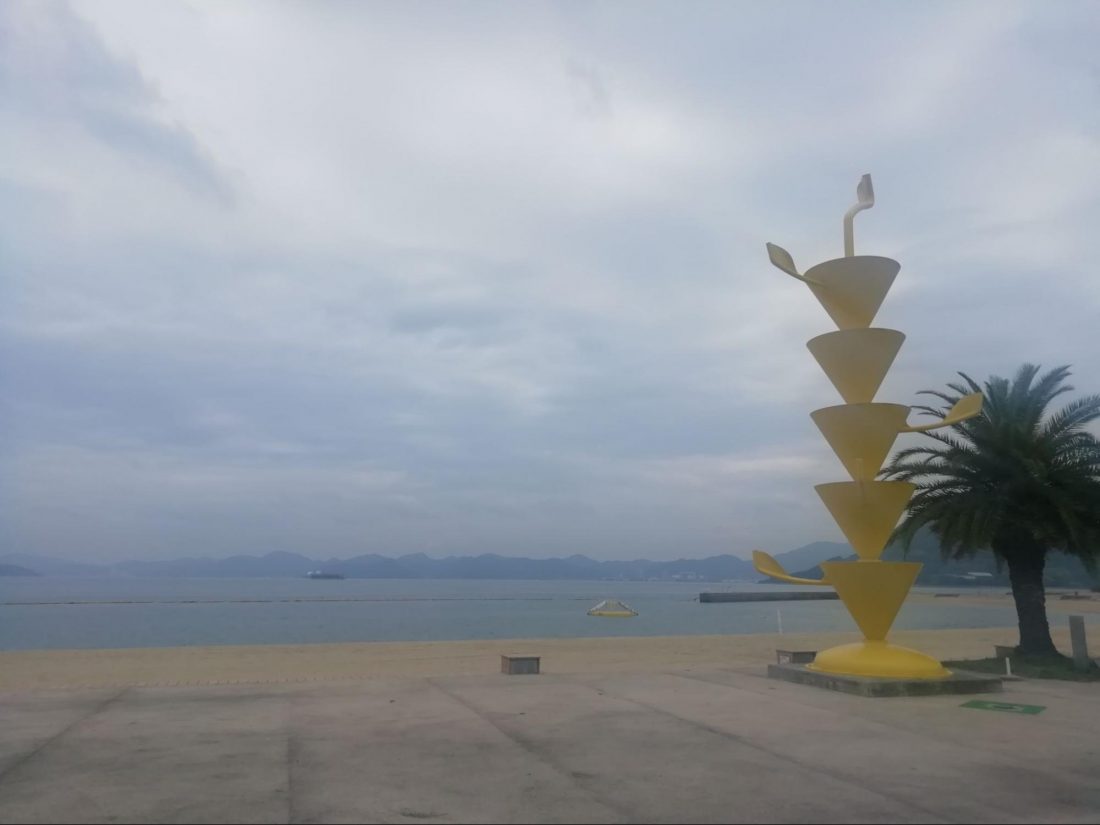
Setoda Sunset Beach is 800 meters of white sand, and it’s quite lovely. In truth, my initial plan was a mid-afternoon start so I could end up at the beach just before sunset and find out how it earned its name. I had the time of the final ferry of the evening and everything was all set. However, I discovered that the Rent-A-Cycle station there closes at 5 p.m., well before sunset. There are no possibilities of “late” drop-offs. Scrap that plan, and now I was at the beach just before noon. In June. Those two tidbits mean the place was practically deserted. The restaurant didn’t even appear to be open, but I wasn’t there to enjoy the beach, I was there to have gotten there, so I found it wonderful.
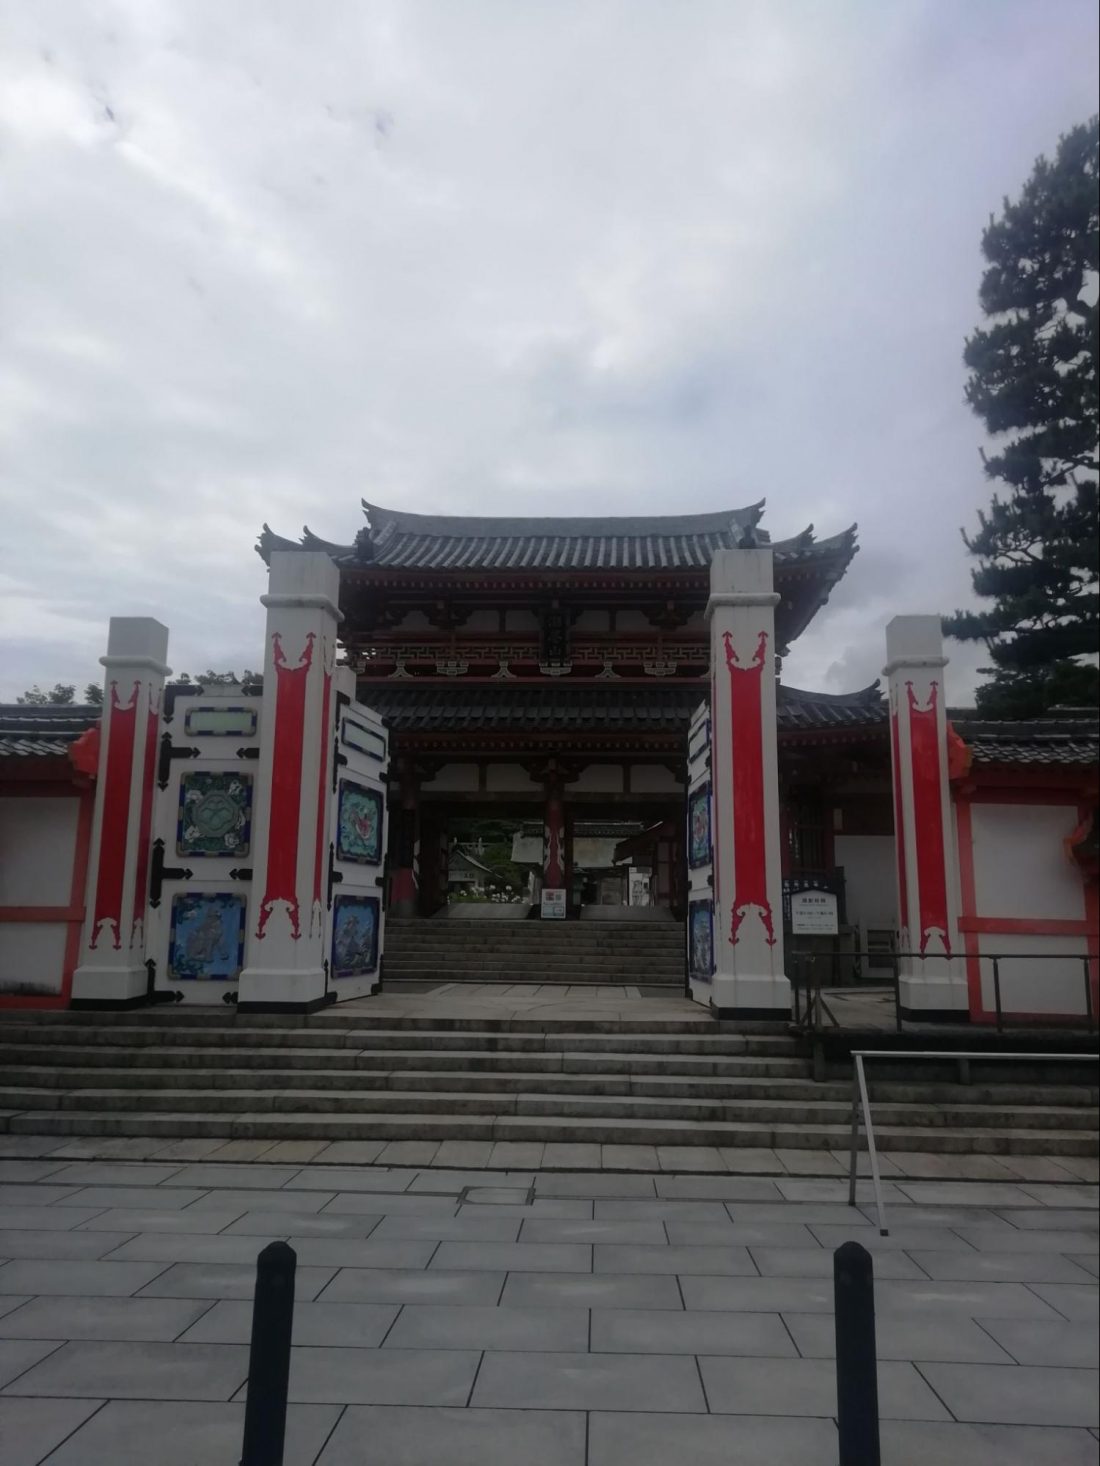
I then worked back to the shopping arcade, called Shiomachi Street, running directly from the Setoda Port to Kosanji Temple, the other landmark I had passed. I still had enough time to get a picture of the temple, with one of the most colorful exteriors I have ever seen in Japan, and get a glass of Lemonade To Go on the shopping street. Citrus is big on these islands, especially lemons, and the lemonade did not disappoint. Tasted like victory.
A ferry back to Onomichi, a slight wait for the train and then home in time to get to work, just as planned. But part of me is still back there on that road. A friend heard of my solo journey, and now we are already beginning plans for a fall excursion. It’s easy to think “30 kilometers? 70 kilometers? That’s just too far. I couldn’t do that.”
But let this 50+ year-old reply, “Not only can you, you’ll be forever thrilled that you gave it a try.”
Challenge completed.